Creating a Project
A project is a place for users and organizations to track the progress of bugs and other issues. To create bugs and other issues, you need to have a project to assign them to.
Note
Creating a project can only be done by a system administrator.
Create a project
To create a project, click the admin link on the main menu, then click Projects, and then select add new project at the top of the screen.
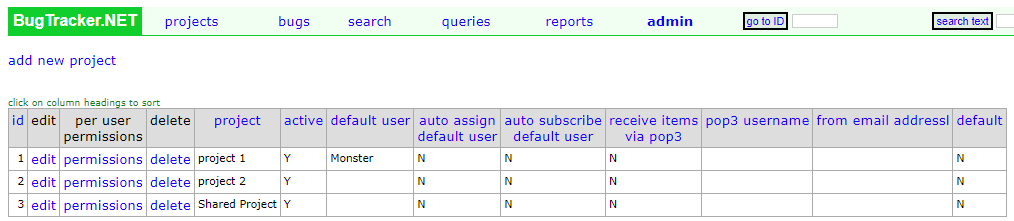
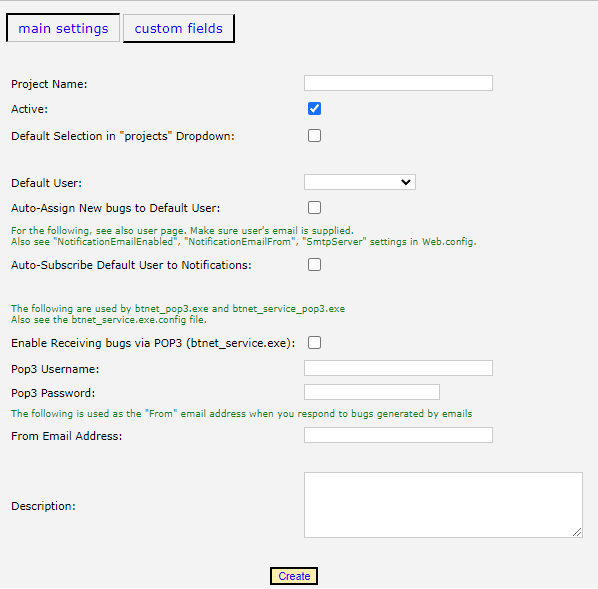
When creating a project the only thing you need to add is a unique name for the project.
Enter a name for the project in the “Project Name” field.
Click the Create button.
Customize the project
There are various ways that you can customize the project.
Setting Default Behavior
There are a few ways to set default behavior.
Setting the default project
Selecting Default Selection in “projects” Dropdown will make this project the default selection when entering new bugs.
Setting the default user
You can also select a default user, and auto assign new bugs to them.
Selecting a user from the Default User drop down box, will auto select them from the user list when creating bugs for this project.
If you want to auto assign bugs to this user, you can check the Auto-assign new bugs to default user checkbox.
If you would like to make sure the default user gets notified on issues, select the Auto-subscribe Default User to Notifications checkbox.
Note
You will need to make sure that the selected user has a valid email address assigned in order to get notifications. You should also look at the “Notification Email Enabled”, “Notification Email From”, and “SmtpServer” settings in the web.config file.
Receiving bugs via email
It is possible to receive bugs from emails. To set this up you will need to select the checkbox and enter the username and password in the appropriate boxes.
For more information on how to set up email see Receiving Bugs Via Email
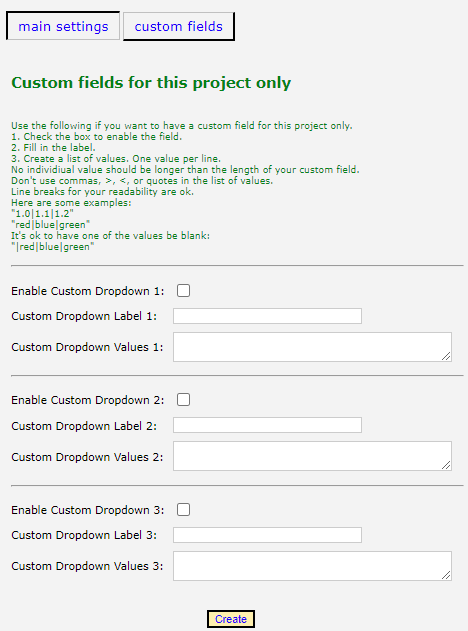
Adding Custom Fields
Each project can have up to 3 custom fields that are specific to that project.
Note
Unlike the general custom fields, these custom fields here are specific to this project, and can only be drop down boxes.
To create a project specific custom field:
Click on the Custom Fields link from the Project Setting page.
Check the checkbox to enable the custom field.
Enter a label for the field.
Enter the values for the custom field. Each value must be separated by a pipe character |